Wave Project:
How Temperature of a Flame Effects Color Produced
For this experiment, we had to do an experiment relating to light waves. Izzy, Grace and I decided to do an experiment on how temperature (used an alcohol flame) effects the frequency of the the light produced.
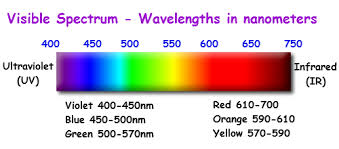
Abstract: For our lab experiment we choose, as a group of three, to evaluate and question how temperature of a flame effects frequency of light produced. Our motivation emerged when Brian mentioned conducting an experiment that had to do with light waves. We contemplated at what color and flame expanse that the temperature would change. When we first did the experiment, Izzy and Grace’s method of using rubbing alcohol to vary the flame heat was unsuccessful. The second experiment Izzy used a camp stove allowing her the ability to control the temperature of the flame. She started out with a cooler flame and gradually increased. Every time that we increased the heat, we would take the temperature of the flame using the thermocouple, and also use the spectroscope to check where the flame was at on the Visible Spectrum. In the end, as we predicted in our hypothesis, when the heat increased, the color moved towards Infrared.
Introduction: In this experiment we focused on heat, in this case a campfire stove flame, and how it affects the color produced. Color is created when energy in different forms is transformed into electromagnetic energy in the field of The Visible Spectrum. In this experiment, we used a thermocouple to measure the heat, in celsius, of the flame. We also used a spectroscope to measure the light, measured in nanometers, in the Visible Spectrum. We chose to do this experiment because we were interested how these two things interlocked. We predict that as the heat of the flame increases, the color will shift further towards infrared in the Visible Spectrum.
Question and Hypothesis:
How does the temperature of a flame affect the frequency of light produced?
If the heat of the flame affects the frequency of light then the hotter the flame, the higher the frequency because there is more energy in the light wave.
Method and Materials:
Results:
Temperature (celsius) Color wavelength (nanometers)
402° - 510
545° - 550
750° - 590
900° - 670
1036° - 710
Discussion:
This experiment was a very educational and enlightening assignment. We decided to create this experiment in order to understand how heat affects color. As you can tell from our hypothesis, we expected the color (measured in nanometers) to move towards the infrared side of the Spectrum. After doing our experiment, we discovered that, in fact, we were correct. When the flame was at a higher temperature, the color shifted further towards the infrared side of the spectrum. This experiment was very significant in the way that it taught us about the basic concepts of color, the Visible Spectrum, and the direct correlation between heat and color. However,it took us several attempts to conduct a reliable experiment. The first time, we used a rubbing alcohol flame so adjusting the heat in consistent intervals was impossible. We quickly realized this didn't work, so we then used a campfire-stove flame, allowing us to adjust the temperature in a controlled way. We also had a short amount of time to conduct the experiment correctly so we were unable to get an ample amount of data to make a more informed conclusion as to the effects. We also struggled to read the nanometers. If we were to reconduct this experiment, we would record more data and vary the heat of the flame more drastically. Overall, this experiment, although not perfect, was very informative.
For this experiment, we had to do an experiment relating to light waves. Izzy, Grace and I decided to do an experiment on how temperature (used an alcohol flame) effects the frequency of the the light produced.
Abstract: For our lab experiment we choose, as a group of three, to evaluate and question how temperature of a flame effects frequency of light produced. Our motivation emerged when Brian mentioned conducting an experiment that had to do with light waves. We contemplated at what color and flame expanse that the temperature would change. When we first did the experiment, Izzy and Grace’s method of using rubbing alcohol to vary the flame heat was unsuccessful. The second experiment Izzy used a camp stove allowing her the ability to control the temperature of the flame. She started out with a cooler flame and gradually increased. Every time that we increased the heat, we would take the temperature of the flame using the thermocouple, and also use the spectroscope to check where the flame was at on the Visible Spectrum. In the end, as we predicted in our hypothesis, when the heat increased, the color moved towards Infrared.
Introduction: In this experiment we focused on heat, in this case a campfire stove flame, and how it affects the color produced. Color is created when energy in different forms is transformed into electromagnetic energy in the field of The Visible Spectrum. In this experiment, we used a thermocouple to measure the heat, in celsius, of the flame. We also used a spectroscope to measure the light, measured in nanometers, in the Visible Spectrum. We chose to do this experiment because we were interested how these two things interlocked. We predict that as the heat of the flame increases, the color will shift further towards infrared in the Visible Spectrum.
Question and Hypothesis:
How does the temperature of a flame affect the frequency of light produced?
If the heat of the flame affects the frequency of light then the hotter the flame, the higher the frequency because there is more energy in the light wave.
Method and Materials:
- Matches
- Chart for results
- Computer
- Instrument that measures temperature
- Instrument that measures the frequency of light
- Thermocouple
- Rubbing alcohol
- IPhone for taking pictures
Results:
Temperature (celsius) Color wavelength (nanometers)
402° - 510
545° - 550
750° - 590
900° - 670
1036° - 710
Discussion:
This experiment was a very educational and enlightening assignment. We decided to create this experiment in order to understand how heat affects color. As you can tell from our hypothesis, we expected the color (measured in nanometers) to move towards the infrared side of the Spectrum. After doing our experiment, we discovered that, in fact, we were correct. When the flame was at a higher temperature, the color shifted further towards the infrared side of the spectrum. This experiment was very significant in the way that it taught us about the basic concepts of color, the Visible Spectrum, and the direct correlation between heat and color. However,it took us several attempts to conduct a reliable experiment. The first time, we used a rubbing alcohol flame so adjusting the heat in consistent intervals was impossible. We quickly realized this didn't work, so we then used a campfire-stove flame, allowing us to adjust the temperature in a controlled way. We also had a short amount of time to conduct the experiment correctly so we were unable to get an ample amount of data to make a more informed conclusion as to the effects. We also struggled to read the nanometers. If we were to reconduct this experiment, we would record more data and vary the heat of the flame more drastically. Overall, this experiment, although not perfect, was very informative.
Design it Clean:
|
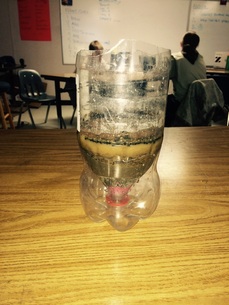
For this project we were too create a water filter that would have cleaner water come out of it. To do this we were put into groups that got assigned a region where they would need to get clean water and we had to make an effective product that would work and would be cost efficient. The region my group was assigned was, Canada.
|
| ||
Snow Science:
|
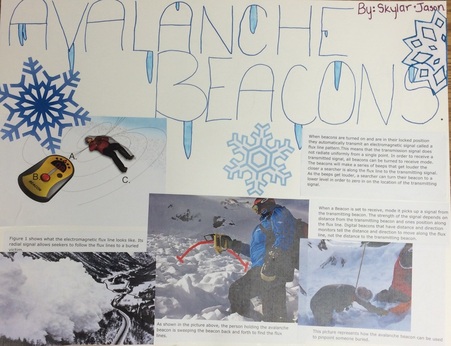
There are many ways in which snow science is relevant to my life. One way is because I live in Colorado where a lot of backcountry is performed. Also because at a ski resort it might not always be the safest so by knowing some of these snow science safeties I could just as well save myself and others. Another way the snow science learned is relevant is because you will have this knowledge forever and it will stick with you. I know that the knowledge I learned will be with me forever while in the backcountry or even just up at a ski resort.
I now understand that the role snow and water play in the American West. The Colorado river is fed by snow melt. Once the snowmelt increases, the river flow will also increase. The Colorado River takes it to the Southwest, where theres only so much water that we share with all the Southwestern states. By using evidence and statistics the water is equally shared between all of the states so no state is left without any water. Though one problem we are currently having is that there is not as much snowfall this year and that creates a place where all the states get less water. Water is one of the most precious resources we have and in a couple years it will be even more precious and valuable than it is today. One skill that I developed throughout this project was all the avalanche related topics. I feel like I understood these topics more than others because it was interesting to me. By learning this it made me want to learn more about them by having me do some of my own research outside of the class. Another reason why I felt intrigued by this is because I want to go backcountry skiing with my family and be able to know what's going on when others might not. There were many other skills i developed but I feel that this was one skill I felt most intrigued by. Overall this project was surprisingly fun and I enjoyed it. One of the things I enjoyed the most was learning about the avalanches and the warning signs of them. I enjoyed this because it was fun and unique. One thing I didn't enjoy to much was all the note taking because I feel that notes don't really help me in an science class because I feel science should be more of an hands on class then sitting in lectures and note taking. Snow Science was a really interesting topic to learn about and I feel I can use the knowledge I learned in my life. |
|
YOLO Project:
|
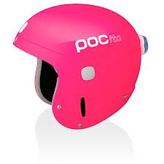
Why You Should Wear Helmets!
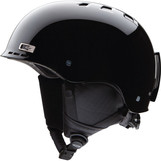
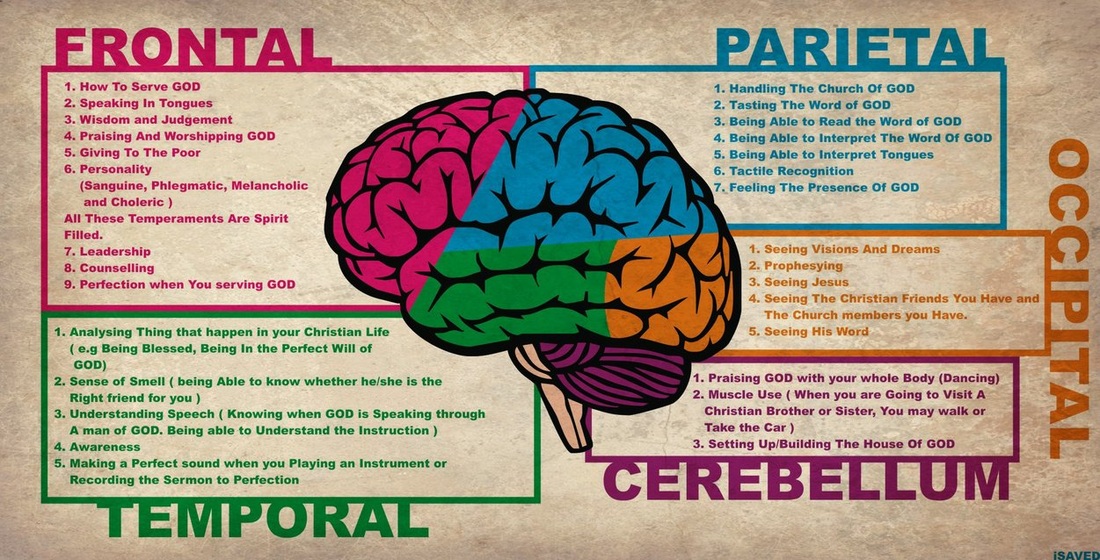
There are many reasons why you should wear a helmet. One reason is that it can protect your brain. “...helmet use increased from 5% to 76%.” (Masia, 1). This data was recorded from 1995 until 2010 from when the helmet use percentage went up. By wearing a helmet, more of the brain injuries can be avoided. They can be avoided by wearing helmets and by watching your surroundings while playing a sport. When you wear a helmet and crash the helmet can protect your head. A helmet is designed to work by increasing the time over which an force is applied. If you do not wear a helmet you have a better chance of getting hurt. If you were not wearing a helmet and got into an accident it could cause brain damage that could last the rest of your life. One way you can cause damage is by getting an concussion or by your brain hitting the inside of your head. Also from having brain damage you might not be able to remember things such as family members names, or where you are. When you crash in a helmet the foam protects your head. It protects your head by capturing your head and letting your head go into it. If you did not have a helmet on while crashing your head would not be caught but instead it would be smashed onto the ground. But your helmet can only protect you when it is fitting the right way. If your helmet were to be fitting the wrong way then the crash could be just as bad as an crash without a helmet. This is why you need to buy a helmet that fits your head. Another reason why you should wear a helmet is to set an good example for the younger generation. By settings these examples hopefully the generation below us will be more smart with their safety. If the generation below us does not have the ability to use helmets and be safe then everything will be good. “Their bikes are not toys, but their first vehicles.” (Helmet on Heads, 1). So if the generation below us, needs to see other people setting the right example for them. I am showing this video because ski race helmets are built an different way from recreational ski helmets. One way they are different is by how they are shaped. They have more cushion like padding but not as much covering the back of the head. So for an more recreational helmet has not as soft cushion like padding. But this helmet has more coverage in the back of the helmet. So either way an helmet is a helmet and it protects your head. The brain serves many important functions. Through the five senses of sight, smell, hearing, touch and taste, the brain receives messages, often many at the same time. The brain controls thought, memory and speech, arm and leg movements, and the function of many organs within the body. It also determines how people respond to stressful situations by regulating heart and breathing rates. The brain is an organized structure, divided into many components that serve specific and important functions. Some of the components are the: cerebrum, frontal lobe, parietal lobe, temporal lobe, occipital lobe and the cerebellum. These all have a role in the brain. reading sources: http://www.distinctlymontana.com/outdoor/history-ski-equipment https://www.skiinghistory.org/history/ski-helmets-how-we-got-here |
Water Bottle Rockets:
Rocket Project
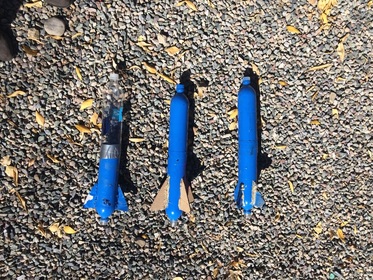
My group consisted of Izzy, Grace and I. We each made the same rocket body the same but with different amounts of wings and different sized wings. Each rocket was made out of 2 Smart-water water bottles. We then attached cardboard wings to each rocket. Izzy's rocket had 4 fins, mine had 3 fins and graces rocket had 2 fins. We chose our material by looking up how to make a water bottle rocket from scratch and the main materials that were needed were, water bottles, and an material for the fin. Our question was “How do the number of fins effect how high the rocket goes?” From our data we figured out that the number of fins does affect it in an way. Our hypothesis was if the number of fins affects the height then I think the rocket with 4 fins will go the highest because the 4 fins will keep it stable while going up in the air. In the end my hypothesis was right and my question was answerable.
Our procedure to complete this was not very clear when we got to the testing set up. We planned to test each rocket 2 times and didn't have a set distance of where we were launching it from. Once we got outside to get ready to launch our rockets we just went to the measurer, and we went to where it ended from the launchpad and it ended up being 56 feet. That distance from the launchpad stayed the same each time we tested the rockets. Step one in testing our rockets were to fill each rocket up with 750mL of water. After we did that we would go out to the launch pad and we would measure our distance from the launchpad at 56 feet. We would then put our psi at 70. Lastly we would pull the string to launch our rocket up.
List of variables kept constant:
-pressure: 70 psi.
-amount of water: 750 mL.
-shape of rockets: all used 2, 1 liter smart-water water bottles.
Our results came out kinda what we expected. I feel we could have made our wings out of a different material because each time we would fill up the bottle with water the fins would end up getting wet and would get all messed up. Our testing didn't make us rethink our design so we never really made any changes to our rocket. For future students conducting this experiment I suggest that you look up some designs and then go from there or you could just wing it like my group did. But overall for this project have fun with it and get creative.
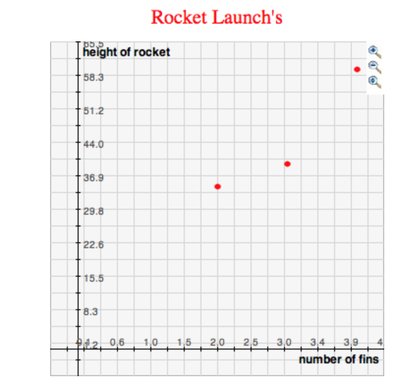
This is our plotted graph with our 2 launches per rocket averaged and there height.
|
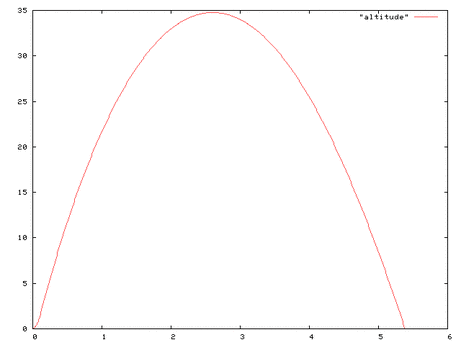
This is the altitude our rocket at exhibition went. (rocket with 4 fins.)
|
